Chicken rice! Have I told you how much I love chicken rice?
There’s just something about it that keeps you wanting more.
I have been known to eat chicken rice and char siu rice (popular in Malaysia and Singapore) everyday for 3 weeks and I have never gotten sick of it. Up to this day, even when I return home to Malaysia, I would harp Madam Mummy or the Boy to take me out to my favourite chicken rice shops so that I can indulge.
Luckily for me, my man and beloved husband is a great cook and has learnt that to keep his wife happy is to feed her. Feed her all the things she loves to eat. That way no nagging will ensue and there is peace and quiet in the house (until the next meal time of course).
He has in his course of life, learnt to cook me my favourite chicken rice in roasted form (with chilli & ginger sauce recipe) and in poached form. It is now time for us to share the poached recipe with you 🙂 Bon Appetit!
Hainanese Chicken Rice Recipe
(Recipe is a modification of Ms I-Hua’s Roast Hainanese Chicken Rice)
Ingredients for the Chicken (Poaching):
1 Large Family sized Chicken (Whole) – gutted and cleaned with neck and feet removed
4 Spring Onion stalks
2 Carrots (halved)
5-6 cloves of Garlic (whole)
5-6 slices of Ginger (5mm thick)
2 Tbsp of Light Soy Sauce
Handful of Kosher or any coarse Salt (for exfoliating the chicken)
Mix 1 Tbsp of Sesame Oil + 1 Tbsp of Light Soy Sauce
Ingredients for the Rice
2 cups of Long Grain Rice (if cooking for more, adjust amount of ingredients accordingly)
2 tsp of Salt
5-6 slices of Ginger (2-3mm thick)
2 cloves of Garlic (finely diced)
2 1/4 cups of Chicken Stock
1 Pandan Leaf (knotted)
2 Tbsp of Chicken fat with skin attached (obtained by trimming excess fat from chicken)
2 Tbsp of Water
Ingredients for the Soup
Chicken Stock from poaching the chicken
1/2 of a White Radish/Daikon (cut into large chunks)
1 tsp of Salt
Few dashes of Ground White Pepper
Ingredients for the Chilli Sauce
4 whole Red Chillies (fairly large sized)
2 cloves of Garlic (finely diced)
4 slices of Ginger (2mm thick)
1 Tbsp of Lime Juice (Calamansi lime preferred)
1 tsp of Caster Sugar
1 Tbsp of Chicken Stock
1 tsp of Chicken Oil (obtained from rendered chicken fat during the rice preparation)
Pinch of Salt (to taste)
Ingredients for the Ginger Sauce
40g of Ginger (finely diced)
1 clove of Garlic (finely diced)
2 Tbsp of Spring Onion (finely sliced)
1 Tbsp of Chicken Stock
1 tsp of Chicken Oil (obtained from rendered chicken fat during the rice preparation)
Pinch of Salt (to taste)
Ingredient for the Sides
1 Cucumber – cut into half (lengthwise) and sliced into 2 cm slices (diagonally)
Coriander leaves (for garnishing)
Step 1: Poaching the Chicken.
Trim off any excess fat and skin from the chicken and keep it aside (this will be used for the rice in Step 2).
Next, it’s time to ”exfoliate“! Exfoliating the chicken helps remove any trapped dirt or yucky stuff off the skin.
Grab a handful of coarse or kosher salt and start rubbing all over the skin but at the same time being careful not to tear or damage the skin. You should see a smooth clean skin once completed.
The next step is to give your chicken a work out! There is a theory that when most chickens are “killed“, their muscles tend to tense up and constrict. By giving the legs and wings gentle pulls and stretches, it should ease the muscle tension and thus giving you a more juicy and tender soft flesh at the end.
Boil a large pot of water (that can fit a whole chicken) with the carrots and 2 spring onion stalks.
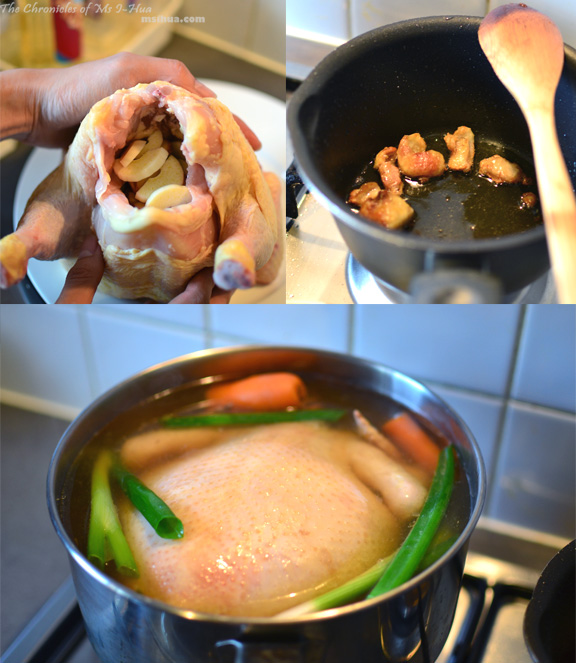
Rub chicken cavity with light soy sauce. Fill it with garlic cloves, ginger slices and remaining 2 spring onion stalks.
Put chicken into the large pot (breast-side down) and lower the heat and let it simmer for 15 minutes (don’t let it boil) uncovered. Switch heat off, cover with lid and let it stand in the pot for 40 minutes.
Take chicken out (keep poaching stock) and empty the cavity. Rub all over with the mixture of sesame oil & light soy sauce.
Leave aside to cool for 10-15 minutes before cutting into desired pieces. Here’s a handy tip from Adam Liaw’s TwoAsian Kitchen cookbook, which is to pour a mixture of 6oml hot chicken stock + 1 Tbsp of Sesame Oil + 2 Tbsp of Light Soy Sauce over the chicken pieces just before serving.
Step 2: Rice.
Wash the rice with 3 to 4 changes of water to remove excess starch and other impurities. Soak rice in water (water must completely cover the top) with 1 teaspoon of salt added. Soak for 10 minutes and drain once completed.
Remember that excess chicken fat and skin at the start of Step 1? You’ll need to render the fat. To do so, heat a wok on medium heat and add the chicken fat with 2 tablespoons of water. Bring it down to a low simmering boil for about 10 minutes until oil is released from the fat. Transfer oil into a small bowl. You can keep the crispy chicken fat/skin as garnish for the rice.
In the same wok, pour 2 Tablespoons of the chicken oil. Add garlic and ginger and fry until fragrant (approx. 1 to 2 minutes) under medium heat. Add in rice and 1 teaspoon of salt and continue to fry for another 2 minutes. Transfer all ingredients into a rice cooker. Add chicken stock and pandan leaf and cook rice until done. Once cooked, use a fork to fluff the rice.
Step 3: Soup.
Boil poaching stock (from step 1) and add white radish (and/or chicken frames if you have any) in a small stock pot on medium heat until white radish softens. Season with salt and pepper. Simmer or keep warm on very low heat until ready to serve. Garnish with spring onion slices or coriander leaves when serving.
Step 4: Chilli Sauce.
If you prefer the sauce with less heat, remove the chilli seeds. Do this easily by cutting a slit along the chilli (lengthwise) and remove the seeds by scrapping away using the sharp end of the knife. Keep the seeds if you prefer it spicy. Now, remove the stalk and finely dice the chillies.
Grab a mortar and pestle. Add chillies, garlic and ginger and start pounding. Continue pounding until you get a paste like consistency. Transfer chilli paste into a bowl and add all other ingredients. Give it a good stir and your sauce is ready. Alternatively, you can use a food processor.
Step 5: Ginger Sauce.
Grab a mortar and pestle. Add ginger, garlic and spring onions and start pounding. Keep pounding until you reach a paste like consistency. Transfer ginger paste into a bowl and add all other ingredients and give it a good stir. Once again, you can use a food processor for this.
Step 6: Plating Up.
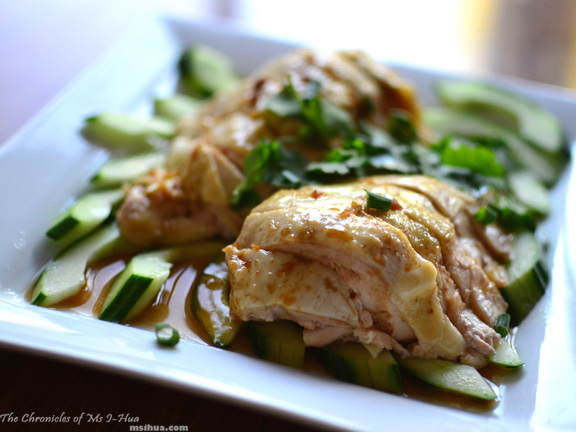
To plate, slice up some cucumbers (into any shape) on the bottom of the plate. Place the pieces of chicken (keeping them intact in their shape) on top of the cucumber slices.
Drizzle the gravy (see step 1) over the chicken. Sprinkle spring onion and coriander over the chicken.
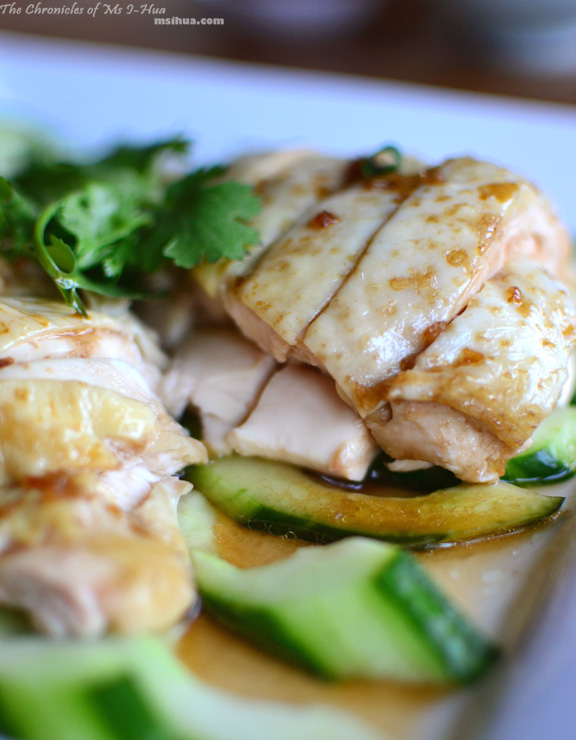 It’s enough to make everyone at the table salivate at the drool-worthy sight of the chicken pieces piled atop of each other.
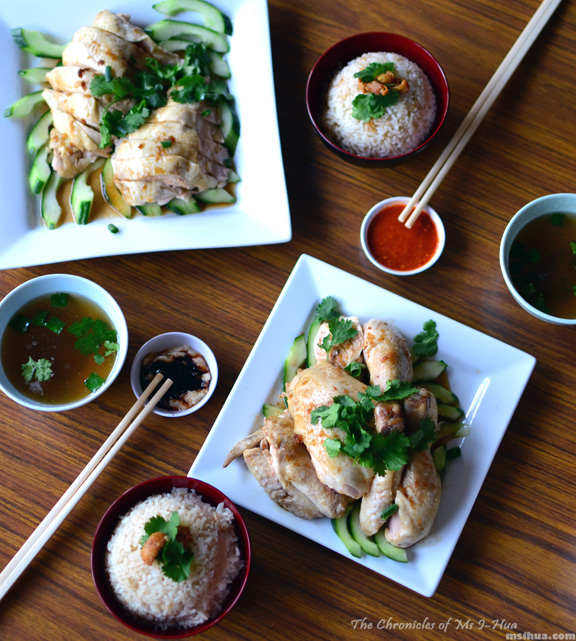
Serve with Hainanese Chicken rice chilli sauce (if you are lazy, you can find ready made ones available at most Asian Grocery outlets), ginger paste as well as garlic oil mixed with dark soy sauce.
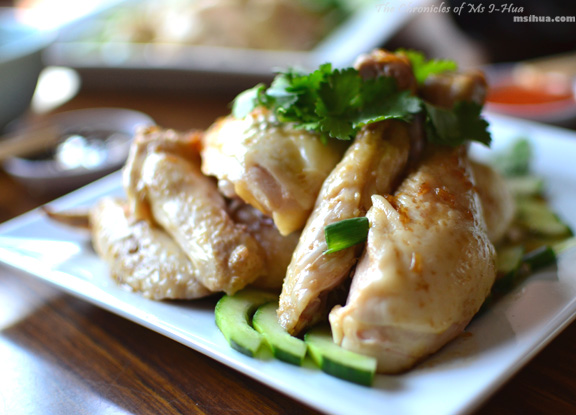
The Boy usually attacks the breasts (0_0) whilst I go straight for the thighs and legs (makes us a happy couple).
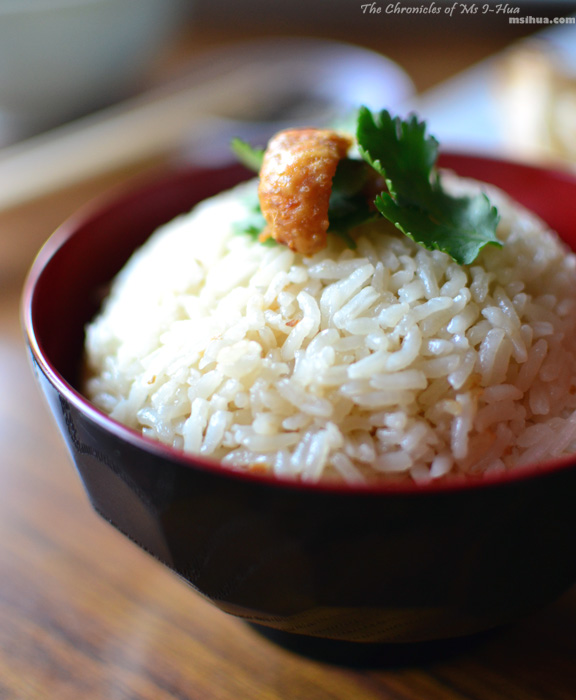
Serve with a heap bowl of Hainanese Chicken Rice and garnish with a piece of rendered chicken skin for extra texture and flavour.
Are you a breast or leg person when it comes to chicken? Also, do you prefer this poached version or the roasted version?
Yum!!! I’m a super big fan of chicken rice too! Both the poached hainanese version and the roasted ones too. Can’t decide which I like better, because being the greedy pig that I am, I always order half half when I’m in Malaysia haha! 😛
Hooray! The only place that lets you do half and half 🙂
I miiiiiiss your face!! You make me even want to eat meat and rice.
Also, have you seen the After Ever After video??? Imma posting it to your wall now.
Waits! Shall run to the video.. miss you smelly banana face too!
THANK YOU!!!!!!!!! For posting this recipe! I love chicken rice I could probably eat it everyday too! Noms! 🙂
Great photo styling btw 🙂
Aww thanks! Also great carving skills??
I just had this yesterday! Yum. Still need to learn how to make it from my parents. I am also more of a thigh/leg person, and I prefer poached!
Noms! I can eat this everyday.. oh wait I already said that 0_0
So delicious indeed! All the extra love and ingredients make it so special and wonderful- thanks for sharing!
I much prefer the thigh meat too, but hate drumsticks for some reason 🙂 I’ll certainly try the work out tip for the chicken next time 🙂
Hooray for thigh lovers.. I’m starting to find drumsticks annoying!
Such amazing presentation! Love Hainanese Chicken Rice – family favourite 🙂
Thanks babe! It does remind me of family!
This looks great – love the tip about giving your chicken a workout as well.
1 2 1 2 1 2 🙂
OMG this looks so damn good, even though I haven’t tasted it but I dare say it’s probably better than a lot of Malaysian restaurants here in Melbourne!!! 🙂
You guys are cooking so many amazing dishes at home lately 😀
Hahaha you’re such a cutie!
What, you like chicken rice? Why didn’t I know that? :p
Ahh my young padawan…
Yummy!! I love both rice and chicken 🙂 :-), but it’s amazing of seeing both dish combination and the pictures makes my mouth watering to eat it now. Keep rocking 🙂
this looks fantastic! is that enough time to cook the chicken? i was surprised! i hope to make this soon!
Yup! Surprisingly it’s done in that time!
I like breast ( white meat) poach’d or steamed with the rice. But fried crispy skin thighs are also great.
I will be making this week as legs were down down. $ pecial!!!!
The Boy loves breast too, and I love legs.. so it works perfectly!
I hate to ask silly question, but what kind of red chili do you use? Raw? Dried? Never made a chili sauce before… The recipe and pictures look amazing. I can’t seem to find a good Hainan Chicken and Rice locally, so I think I’m going to have to make this recipe 🙂
I use fresh red chillies 🙂 Not a silly question at all!
Perfect recipe! The chicken is to die for (though I still need to learn how to carve the chicken, geez), and the chili sauce is sooo simple. Thanks for sharing!
Thank you and you are welcome 🙂
This is really a great recipe. We tried it last night and the flavours were spot on. Only comment is that our chicken was tender enough. We followed the exact timing that was required…. 🙁 Our chicken was still a tiny bit tough, and I think it would have been softer. What do we do? Do we let it sit in the pot more than 40 minutes?
Thanks for sharing this recipe! we had a great meal overall!